Timekeeper Functions
-
Adding New Employees
Adding an employee is a three-step process: gather basic employee details, create a position & assign to a shift, and enroll fingerprints.
-
Basic Employee details
- Go to https://timesheets.brooklyn.cuny.edu
- Login using your credentials
- Click on the Employees tab
- Click on the Add Employee button
- Enter basic information about the employee, such as CUNY EMPLID, First & Last Name and Email.
- Press Continue to proceed to next step
Step 1 of 3 Basic Employee RecordStep 2 of 3 Employee Position & ShiftStep 3 of 3 Enroll Fingerprints to begin using the Punch Clock
-
Creating a position + assigning a shift
- While in the employee record, click on the Add Employee Position button
- Select the appropriate Employment Type, Department, Hire Date and the rest of the fields.
Note:
Hire Date is the first day the employee will be able to punch in and use the TMS. - Select the appropriate Shift and Effective date
Note:
For new employees, Effective Date should match Hire Date. - Press Save to save create and assign the position and shift.
Step 1 of 3 Basic Employee RecordStep 2 of 3 Employee Position & ShiftStep 3 of 3 Enroll Fingerprints to begin using the Punch Clock
In the past, initial assignment of the shift was a separate process.
We have now streamlined this step to allow you to add employees faster. -
Enrolling Fingerprints
- At the Punch Clock station, press Configure button, on top right corner of the screen, to open the Login screen or
- Enter your login credentials and press Login

- The Administrative Panel has 3 main tabs (Settings, Fingerprint Enrollment, and License)
- Select the Fingerprint Enrollment tab

- Make sure that the desired Department is selected
-
Enrollment Process
- On the Left side, select the employee whose fingerprints you would like to enroll.
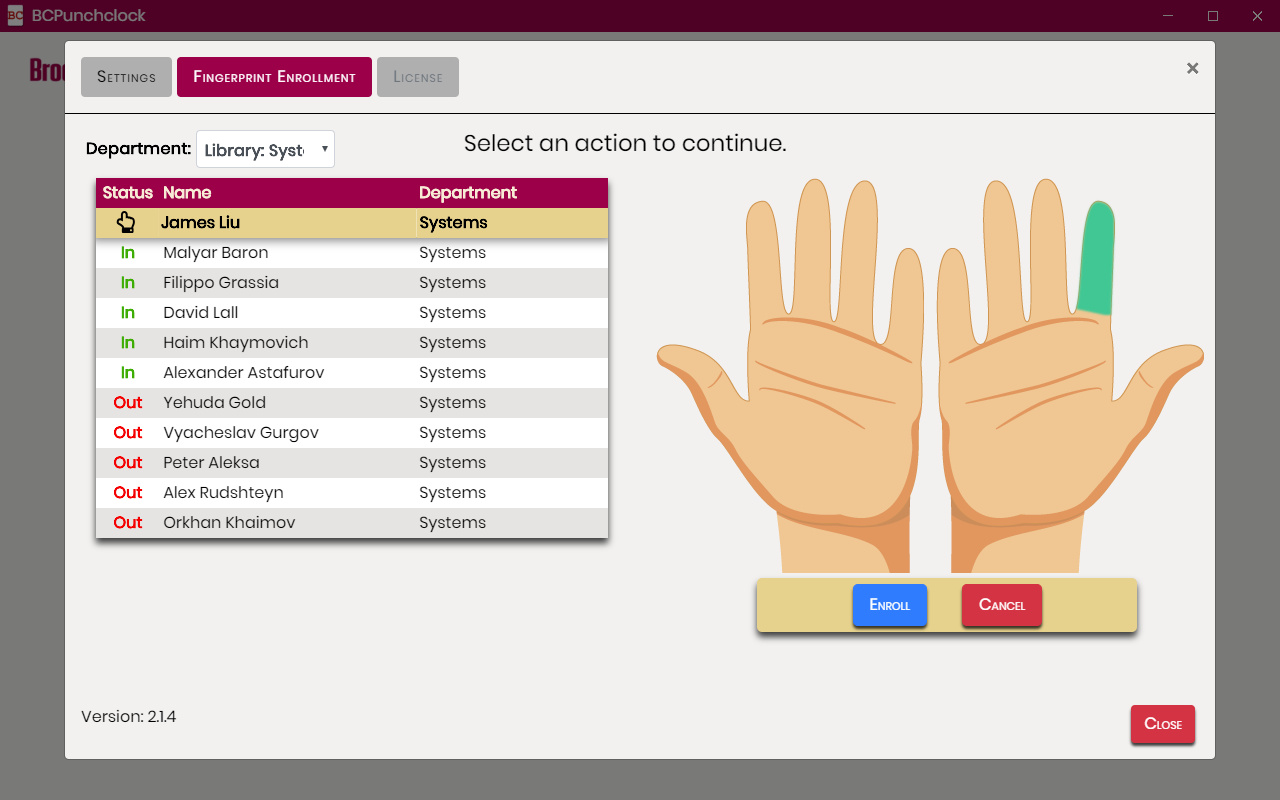
When selected, you will be presented with an image of two hands displayed on the right highlighting enrolled fingers in green. - Select the finger you would like to enroll and press the Enroll button.
Note: If a fingerprint is already enrolled, selecting it will give you an option to Re-Enroll or Delete that fingerprint. - Have the employee place the corresponding finger on the fingerprint reader 4 times (each time making sure the fingerprint is registering)

- Once the Fingerprint is captured (after 4 successful scans), Press Save to enroll the finger
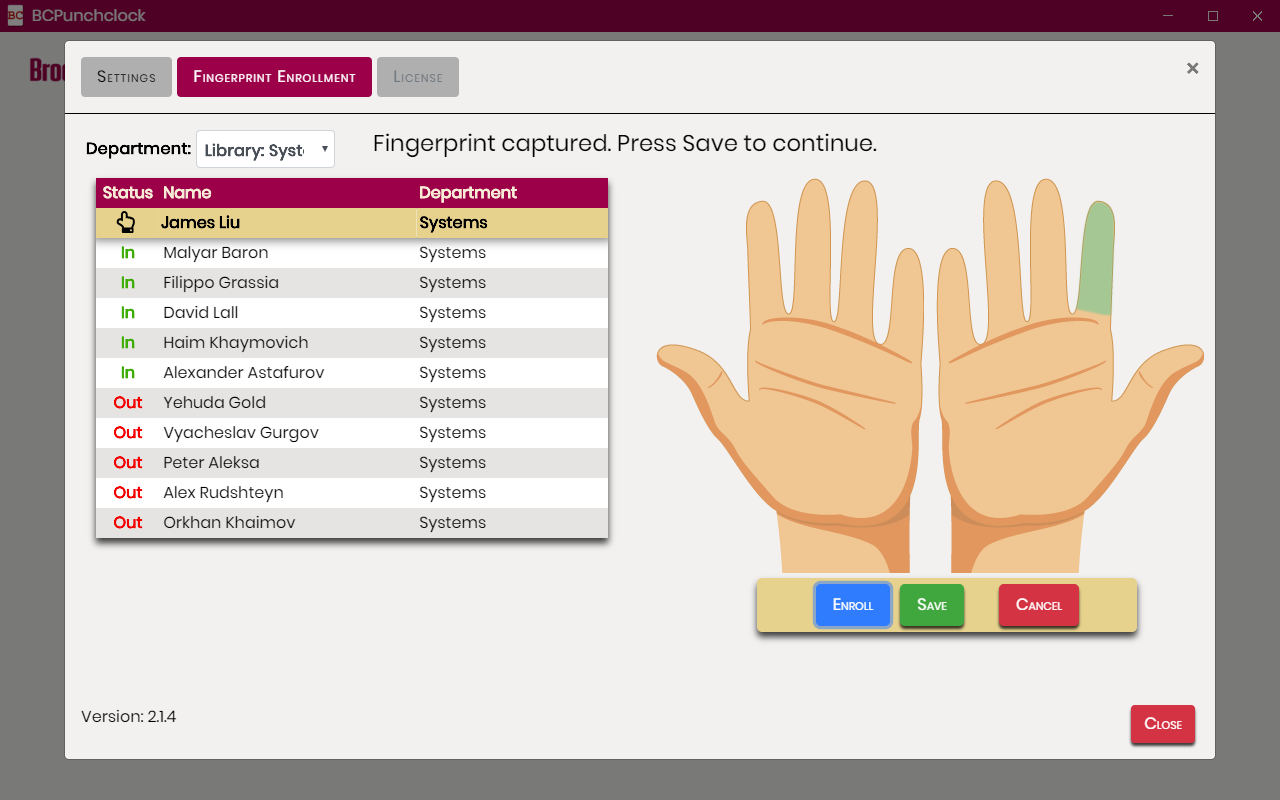
- Proceed with the next finger or employee.
Step 1 of 3 Basic Employee RecordStep 2 of 3 Employee Position & ShiftStep 3 of 3 Enroll Fingerprints to begin using the Punch Clock - On the Left side, select the employee whose fingerprints you would like to enroll.
-
Basic Employee details
-
Timesheet Stages Explained
-
Initial
- All timesheets begin in this stage.
- It is the only stage where employees are allowed to make changes to their timesheet.
- Printing a timesheet in this stage will have a “Not Verified” watermark.
-
Ready for Verification
- Once employees are ready to hand off their timesheet to their timekeeper, they may mark their timesheet as Ready for Verification.
- Should they want to make changes, employees can transition their timesheet back to the Initial stage and make necessary corrections.
- Timekeepers are notified that they have a timesheet to verify.
- Printing a timesheet in this stage will have a “Not Verified” watermark.
-
Timekeeper Verified
- Once a timekeeper verifies a timesheet, employees will no longer be able to make any corrections.
- All further corrections can only be made by timekeepers and supervisors.
- Printing a timesheet in this stage will no longer have any watermarks.
- Employees are notified that their timesheets were verified.
- Supervisors are notified that they have a timesheet that needs to be approved.
-
Supervisor Approved
- Once a supervisor approves a timesheet, timekeepers will no longer be able to make any corrections.
- Timesheets are now ready to be submitted.
-
Timesheet Submitted
- Employees are notified that their timesheet was submitted.
- HR is notified of timesheet(s) being submitted with a copy of the timesheet(s) attached.
- TMS stores all copies of timesheets for future reference.
-
HR Reviewed
- Supervisors are no longer able to make changes to the timesheets submitted.
- Once HR reviews a timesheet, it will subtract hours worked and leaves from Employee Leave Bank.
-
Initial
-
Managing Punch-Ins (& Outs)
-
From the Timesheet view, click on a day for which you’d like to add/modify punch ins.
A dialog will open showing the employee's schedule, punch-ins for the day, leaves, pertinent calculations, such as lateness penalty, overtime and shift differential.
-
To add a single punch-in, click on the Add time button.
-
You may add additional punch-ins by clicking Add time, or any + Add button, whether before, between, or after existing punch-ins.
Adding a punch-in in front of existing ones, will move all consecutive, existing punch-ins forward. Conversely, removing a punch-in the middle of punch-in series, will move all consecutive punch-ins backward.
-
You can adjust the time of a punch-in by typing over it or by clicking on the up/down arrows.
Newly added, unsaved punch-ins will have a yellow background, while previously saved punch-ins will have a gray background. Punch-ins can have a red background, in case of a time error.
-
You may remove a punch in by clicking the X button located in the top right corner of its box.
-
To save time, punch-ins can be added and removed in pairs, by clicking Add time block and Remove block buttons, respectively.
-
At this point, you can either work on other sections of this popup dialog before saving, or press Save to record all of the changes made for that day.
-
From the Timesheet view, click on a day for which you’d like to add/modify punch ins.
-
Entering Leaves
-
From the Timesheet view, click on a day for which you’d like to add or modify leaves.
A dialog will open showing the employee's schedule, punch-ins for the day, leaves, pertinent calculations, such as lateness penalty, overtime and shift differential.
-
Under the Leaves column, click the Modify Leaves button. A second popup dialog will open showing all available leaves.
-
Choose the time for the leave you would like to assign or check the Apply checkbox, as specified, and press the Confirm button. The specified leave time will be assigned for the given day, ready to be saved.
-
At this point, you can either work on other sections of this popup dialog before saving, or press Save to record all of the changes made for that day.
-
-
Modifying entire timesheets with a single Save
-
From the Timesheet view, click on the Display Quick Change Controls slide-out menu.
-
Note: On each day, you will notice that + Add time buttons appeared under Time In/Out columns, as well as, Modify button under Leaves column.
-
Clicking on the + Add time button will add a time block for that day. Each time block will start off with the employee's shift for that day, and can be modified as needed.
Note: Modifying time in/out in this step is similar to <Managing Punch-Ins> step above. -
Clicking on the Modify button (under Leaves column) will open a Leaves dialog (see <Entering Leaves> step below). Choose the leave(s) you need to assign for that day and press the Assign button for the leave to appear for that day.
-
Once you are satisfied with your changes, press the Save button on the Quick Change Controls slideout menu, to save the entire timesheet at once, or you may press the Cancel button, should you not want to save your changes.
-
In either case, whether you choose to save your changes or not, press the Hide Quick Change Controls slide-out menu to hide all quick change buttons along with the slideout menu.
-
-
Employee forgot to Punch Out
Occasionally, you might notice that employees forget to punch out. One indicator is when there's only 1 minute recorded for the working day and the day is highlighted in red, preventing you from verifying and approving the timesheet.
The reason only 1 minute is recorded is that TMS operates overnight to identify employees who forgot to clock out. Instead of clocking out at the end of their shift, it records the punch-out 1 minute after the employee punched in. This allows the timekeeper to address the issue with the employee and manually correct the record as needed.
-
To start, click on the day in question to open a popup dialog showing the times.
A dialog will open showing the employee's schedule, punch-ins for the day, leaves, pertinent calculations, such as lateness penalty, overtime and shift differential.
-
An Enforced Punch-Out message will appear above the relevant entry, indicating that it needs the attention of a timekeeper or supervisor.
Note: The red message will only disappear once a timekeeper or supervisor updates the punch-out to reflect the actual time the employee finished their shift.
-
After making the correction, press Save to record the change.
-
-
Lateness Penalty
- Coming soon
-
Offline Punch-ins
- Coming soon
-
Discarding & Restoring punch-ins
- Coming soon
-
Confirming Photos
- Coming soon
-
Temporary Shift Changes
Shift exceptions are also known as Temporary Shift Changes or Shift Swaps. Shift exceptions should be created for a temporary schedule change, ie: a day, a few days, a week or two, or every summer. For more permanent shift changes, you should assign a new shift to the employee position, <as shown here>.
-
From the Timesheet view, click on a day you’d like to change shifts, Day View popup dialog will appear.
-
Click the Modify shift button, Modify Shift popup dialog will appear.
-
Choose a Shift you would like to swap to.
-
Select Start and End dates of the shift swap.
-
Choose whether there will be a different Meal Period for this exception.
-
Choose whether there will be a different Overtime rule for this exception.
-
Press Add new shift exception button to save.
-
Back in the Day View popup dialog, make sure the new shift has been applied and close the Day View popup dialog.
-
Back at Timesheet view, make sure the new shift has been applied, if you are swapping shifts for multiple days, click on the next day you would like to work on and follow the steps above.
-
Repeat <Modify shift> change steps above for the other day.
-
When done, confirm your new schedule looks as it should.
-
You can also make changes to a shift exception, should you need.
-
Click on the day with a shift exception, Day View popup dialog will appear.
-
Click the Modify shift exception button, Modify Shift popup dialog will appear.
-
Make your changes as needed and press Save changes button to update the shift change.
-
Alternatively, if you need to delete the shift exception, press on the Delete button.
-
Back in the Timesheet view, make sure your changes took effect.
-
-
Summer Schedules
Summer Schedules are a fast and easy way to assign shift changes required for the summer months. Instead of manually creating shift exceptions for every employee, simply follow the steps below and all the tedious work will be handled by TMS!
-
From the Main Menu, select Administration >> Summer Schedules menu item.
-
Once on the Summer Schedules page, choose an employee from the Employee dropdown and select a Summer Schedule for the employee. Only unassigned employees will appear in the dropdown.
-
Press the Assign button to assign the selected summer schedule to the employee.
-
All assigned summer schedules will be displayed below.
-
-
Verifying Timesheets
-
From the Timesheet view, confirm all times have been entered correctly, making sure all enforced punch-outs have been fixed, shift swaps have been applied, leaves entered, time issues resolved, etc.
-
Click on the Timekeeper Verified stage transition button on top of the timesheet.
-
Confirm when asked to “Move timesheet to Timekeeper Verified stage?” and the timesheet will be marked as Verified.
-
If, after verifying, you notice you need to make a change, click on the Make Changes button, make your corrections and press the Save & Verify button.
-
Once Verified, an email will be sent to the employee notifying of the timesheet progressing down the timesheet lifecycle.
-
Another email will be sent to all supervisors of this department to review and Approve the timesheet.
-